DIY Faux Metal Toolbox: Rusty Finish on Wooden Toolbox
- Tracey Bellion

- Feb 25, 2024
- 4 min read
Can you believe this primitive rusty metal looking tool box is wooden? Let me show you how to create this DIY faux metal toolbox.

If you are a new reader, hello and welcome to the Fancy Fam! With over a decade of furniture painting experience, I can honestly say that sharing my projects through this blog is still my favorite way to inspire! I've got years worth of fun and creative ways to update your home decor and furniture through paint! If this sounds like something you'd like to have delivered to you every Sunday be sure to sign up for my weekly newsletter here!
Before: DIY faux metal toolbox
I found this little wooden gem at the thrift store for just a few bucks....and I knew I wanted to create something for my grandson Hutton with it.

I loved the idea of trying a subtle metal finish on it and I'm going to share my process with you here.
The original finish had some very old decoupaged fruits and veggies on the end that I was only able to pull off a bit. You know how much I despise sanding so I just decided to create over it and use the texture of it to my advantage.
Supplies Used: DIY faux metal toolbox
This post may contain affiliate links. I could make a commission at no charge to you if you purchase my recommended products. Please read my disclosure here and my privacy policy here.
Custom Painted DIY Faux Metal Toolbox
Starting with the Base Coat
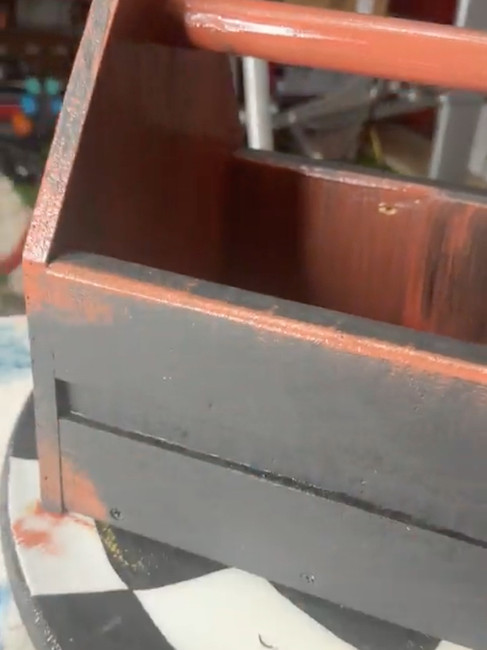
I always base coat my metallic finishes with a dark paint color. I chose Caviar for this one....and applied it with my stippling technique.

While the outside finish was drying I chose Rusty Nail for the inside color. I applied this with the same brush I used to paint black and I did NOT rinse my brush in between colors so the inside finish would have streaks of black in it....as if it was covered in grease and oil.
Once the rust was applied on the inside.....and with the rust color still on my brush......I began dry brushing that rust color over the black on the outer area of the box....on the corners and edges as if it were rusting.
You can see here how haphazardly I applied it....knowing it would be covered by a metallic color next. This just allows a light hint of rusty under layer.

Creating the Faux Metal Finish on Wooden Toolbox
Time for a little Moonshine!!!

I absolutely love Silver Bullet!!! It is a glorious silver that offers crazy good coverage!
Using my premium chip brush which is a great choice when wanting a dry brushed or cross-hatched finish.....I began lightly dusting this silver color over the entire piece.
It is best to start light and continue to add this in layers as you move along in the process.
It is crazy amazing how the light brushing of the silver picks up ALL the texture of the stippling and even the old decoupage that was there originally.

I was able to achieve this rusty metallic look with just one coat of each color......black, rust and silver! Boom!!!
Personalizing with Design Transfers
This set the perfect backdrop for me to apply the pieces that I had chosen from Dixie Belle's Rusty Truck transfer!
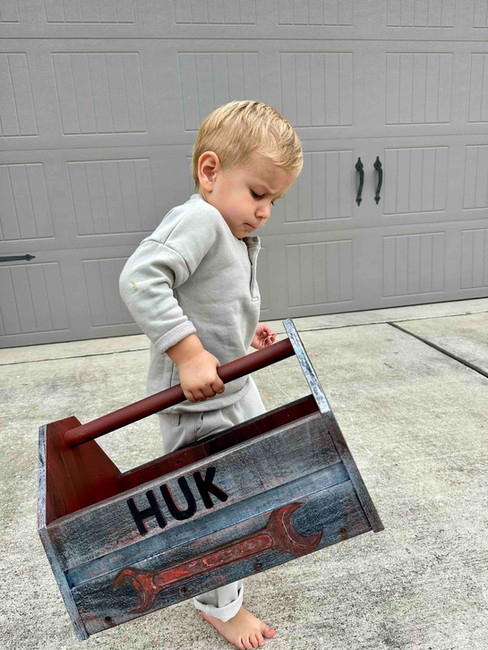
I especially loved the long rusty wrench and the rusted out wrecker sign!! The wrench was perfect for the shape of the side of the tool box!

I've used transfers on hundreds of projects and I encourage you to give them a try if you haven't already!
On the flip side of the box I applied several of these tiny license plates. The two end were covered with a rusty wrecker service sign.

And then the Texas plate because.....we are Texans!

The oil streaked inside was the perfect backdrop for gasoline pump! Isn't that cute?!?!

Adding Some Finishing Touches
The tool box still looked too NEW. I needed to grunge it up a bit.....so I added a little faux rust to each and every screw.
I just used a tiny craft brush and a bit of the bronze metallic paint from the Patina line. I painted directly over the silver screws and then painted downward in the direction that rust would naturally run. I LOVE this touch!
Finally.....lets personalize this adorable tool box!
I just hand painted in simple letters .....the name HUK. This is Hutton's nick-name....and it was the perfect way to bring this project to a close!

Furniture transfers do require a top coat to keep them from eventually peeling so I applied a single coat of Satin Top coat over the entire thing.
For more hand painted gift ideas for the whole family...HERE are 30+ Hand Painted Gift Ideas!
The Finished Look: DIY Faux Metal Toolbox
What do you think of this faux metal finish? Pretty fun, right?

I love watching Hutton carry around in his very first toolbox!

I'm quite certain one day soon it will be full of balls....as they seem to be his favorite thing in the entire world....and he has more balls than any three year old I've ever known!
I hope you'll give this metallic finish a try!
As you can see it is quite easy, fast and a lot of fun!
More Inspiration
Here are some additional designs for your inspiration:
Steam Punk Tea Set - proper and grunge at the same
Memory Trunk Restoration - easy DIY antique
Nailhead Trim Box - faux nailhead trim using a stencil
Click on any photo below for more up-close photos and all the design details
JOIN ME FOR MORE...with Curiously Creative
If you enjoyed this and want more of a deep dive into home decor and DIY processes, I would love it if you joined my exclusive online creative group, Curiously Creative. I show up LIVE to guide you through every step of updating, upcycling, crafting, and creating on-trend home decor and gift-giving ideas!
Want more fancy furniture & design?
Save & Share on Pinterest!
Please please please share my faux metal wooden toolbox project and follow me on Pinterest!


Hey Tracey! I wanted to Pin this so i can go back and make one for my grandson but i couldn't find the PIN or anything. It turned out so cute and your grandson is adorable.