Sweet Tooth Tea Set
- Isaac Klein

- Jul 16, 2022
- 4 min read
This Sweet Tooth Tea Set looks good enough to eat!

To be honest, if I could paint ALL the stray-tossed aside, forgotten about, unwanted tea set pieces in this candy-colored palette, I WOULD!
Inspiration for this Sweet Tooth Tea Set
This tea set was inspired by a bowl of Jordan Almonds at a baby shower this past weekend.

I am ALWAYS drawn to those brightly colored, smooth-surfaced, candy-coated almonds. They were my mother's favorite movie snack!
Today, I'll guide you through the very basics of painting on tea sets with a few new finishing-touch tips!
My overall purpose for sharing with you here is to inspire you to see BEYOND the traditional "what is expected" norms, and to encourage you to create your very own wonderland! Your surroundings have the ability to affect your mood and vibe. So if you VIBE in color, surround yourself with LOTS of it!
Spilling the tea on this process in the YouTube video!
(Subscribe for weekly videos)
This Sweet Tooth tea "set" was piecemealed together from my stray pieces collection.
I chose a small-ish tray along with a teapot and creamer that actually belonged together, and a random sugar bowl.
When you paint them to be cohesive, they appear as if they were meant to be together all along!
First, each piece was wiped clean with an alcohol wipe.
I then primed with two coats of Slick Stick which is HIGHLY recommended when painting on any slick surface.
Slick Stick protocol: Paint one coat and let dry overnight. Paint a second coat and let it dry for at least two hours before you can begin applying your paint color of choice.
Then, I painted the tea set in a base coat of Saltwater (white) Silk all-in-one mineral paint.
Then, I just set my brain free with thoughts of polka dots, stripes, checks, and LOTS of colors!.
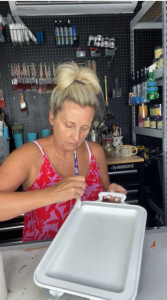
I used a pencil to draw out my stripes and checks.
No tape or ruler was used; just my hand and a pencil.
Remember when working on checks or stripes: divide your spaces evenly so you don't mess up your alternating color pattern.
In this case, pink/white/pink/white (I used Prickly Pear for the pink you see below).
or purple (Lucky Lavendar)/green (Limeade)/purple/green.
For the first time ever, I did choose to use the "drag" technique of adding a swipe of another color through my Prickly Pear pink checks. This is a technique used by McKenzie Childs and is wildly popular. I did this painting of the bright pink checks first and allowed them to dry. I then loaded a brush with both bright pink and Silk Saltwater white side-by-side and swooped it over the pre-painted bright pink. And it worked!
I did this on the checked teapot as well as the checked border around the tray.
The polka dots on the tray were fun to create! I usually use a "brush spin" technique but I wanted to try a blotter! I used a cork to try the "stamp" or "blot," but my paint left too much of a pile and I just didn't like it. So, I reverted to my "brush spin" which is always fun! (you can see the comparison of both below)
I added a nice little swoop of Daisy yellow to each polka dot just to add to the whimsy!

This color palette has me singing!
(you can see some footage of me being silly over on TikTok)
The colors are playful and bold and represented well with the highly pigmented paints that only required a single coat for full coverage!
The final touch was to introduce metallic gold! I wasn't sure I was going to bring in a metallic, but the tea set just didn't seem complete without it!
The gorgeous shine on the completed set was created by top coating with Dixie Belle's strongest top coat ever: Gator Hide.
They also offer their standard top coats which work really well, too, in Flat, Satin, and Gloss! And let me tell you, if you like the Gator Hide Sheen, you will LOVE the gloss top coat! It's like glass!

FAQ: I am often asked if the tea sets are still "functional" for serving tea.
My first thought is, do people really use them? My mom and grandma always just had them stored in the china cabinet! LOL! To be honest, I have not tried it, but I do believe the finish would hold up fine to serve tea. As long as the pieces are not submerged in water! A simple wipe-down with a damp cloth should keep them clean!
This was a VERY quick recap but certainly enough to get you started! I have a full 2-hour class that will guide you step-by-step through the entire process for a successfully painted tea set that you can be proud of!!! Get it here. It is less than $30 and you'll get a full supply list and lifetime access so you can be a tea set-making MACHINE!!!
Ok. I'm off to find more silver pieces!
This was fun!


Comments